Okta Integration with VerifEye
This guide walks you through setting up VerifEye as a generic OpenID Connect (OIDC) provider in Okta, enabling you to use VerifEye's biometric verification as an authentication factor in your Okta-managed applications.
Prerequisites
Before configuring Okta, ensure you have:
- Admin access to your Okta organization
- A VerifEye account and API key, and a verification configuration set up for OIDC integration (see below)
- Understanding of the OpenID Connect flow
Configuring the VerifEye Verification
To integrate VerifEye with Okta, you need to create a VerifEye verification configuration that will be used as the OIDC provider. Follow these steps:
You can create a new verification configuration in the VerifEye Developer Console under Verification Configurations. Make sure to note the configuration ID and API key, as you will need these for the Okta setup.
1. Basic Settings
When creating the verification configuration, set the following basic settings:
2. Verifier Configuration
For the OIDC integration, you must configure the verification configuration to include the following settings:
- Face Recognition
- Unique Match Verification: one person can be only registered once in the system, if the same person tries to register again with a different identifier (email address), the verification will fail
- Match Verification: one person can be registered multiple times in the system, if the same person tries to register again with a different identifier (email address), the verification will pass
Additionally you can configure other settings such as liveness detection, age or gender verification.
3. Advanced Settings
For the OIDC integration, you must also configure the following advanced settings:
- Include Signature: enabled
- Include Verification Result: enabled
- Include Custom Input Parameters: enabled
- Force Signed Input: enabled
Adding VerifEye as Generic OIDC Provider
1. Create New Identity Provider
- Navigate to Security > Identity Providers in your Okta Admin Console
- Click Add Identity Provider
- Select Add OpenID Connect IdP
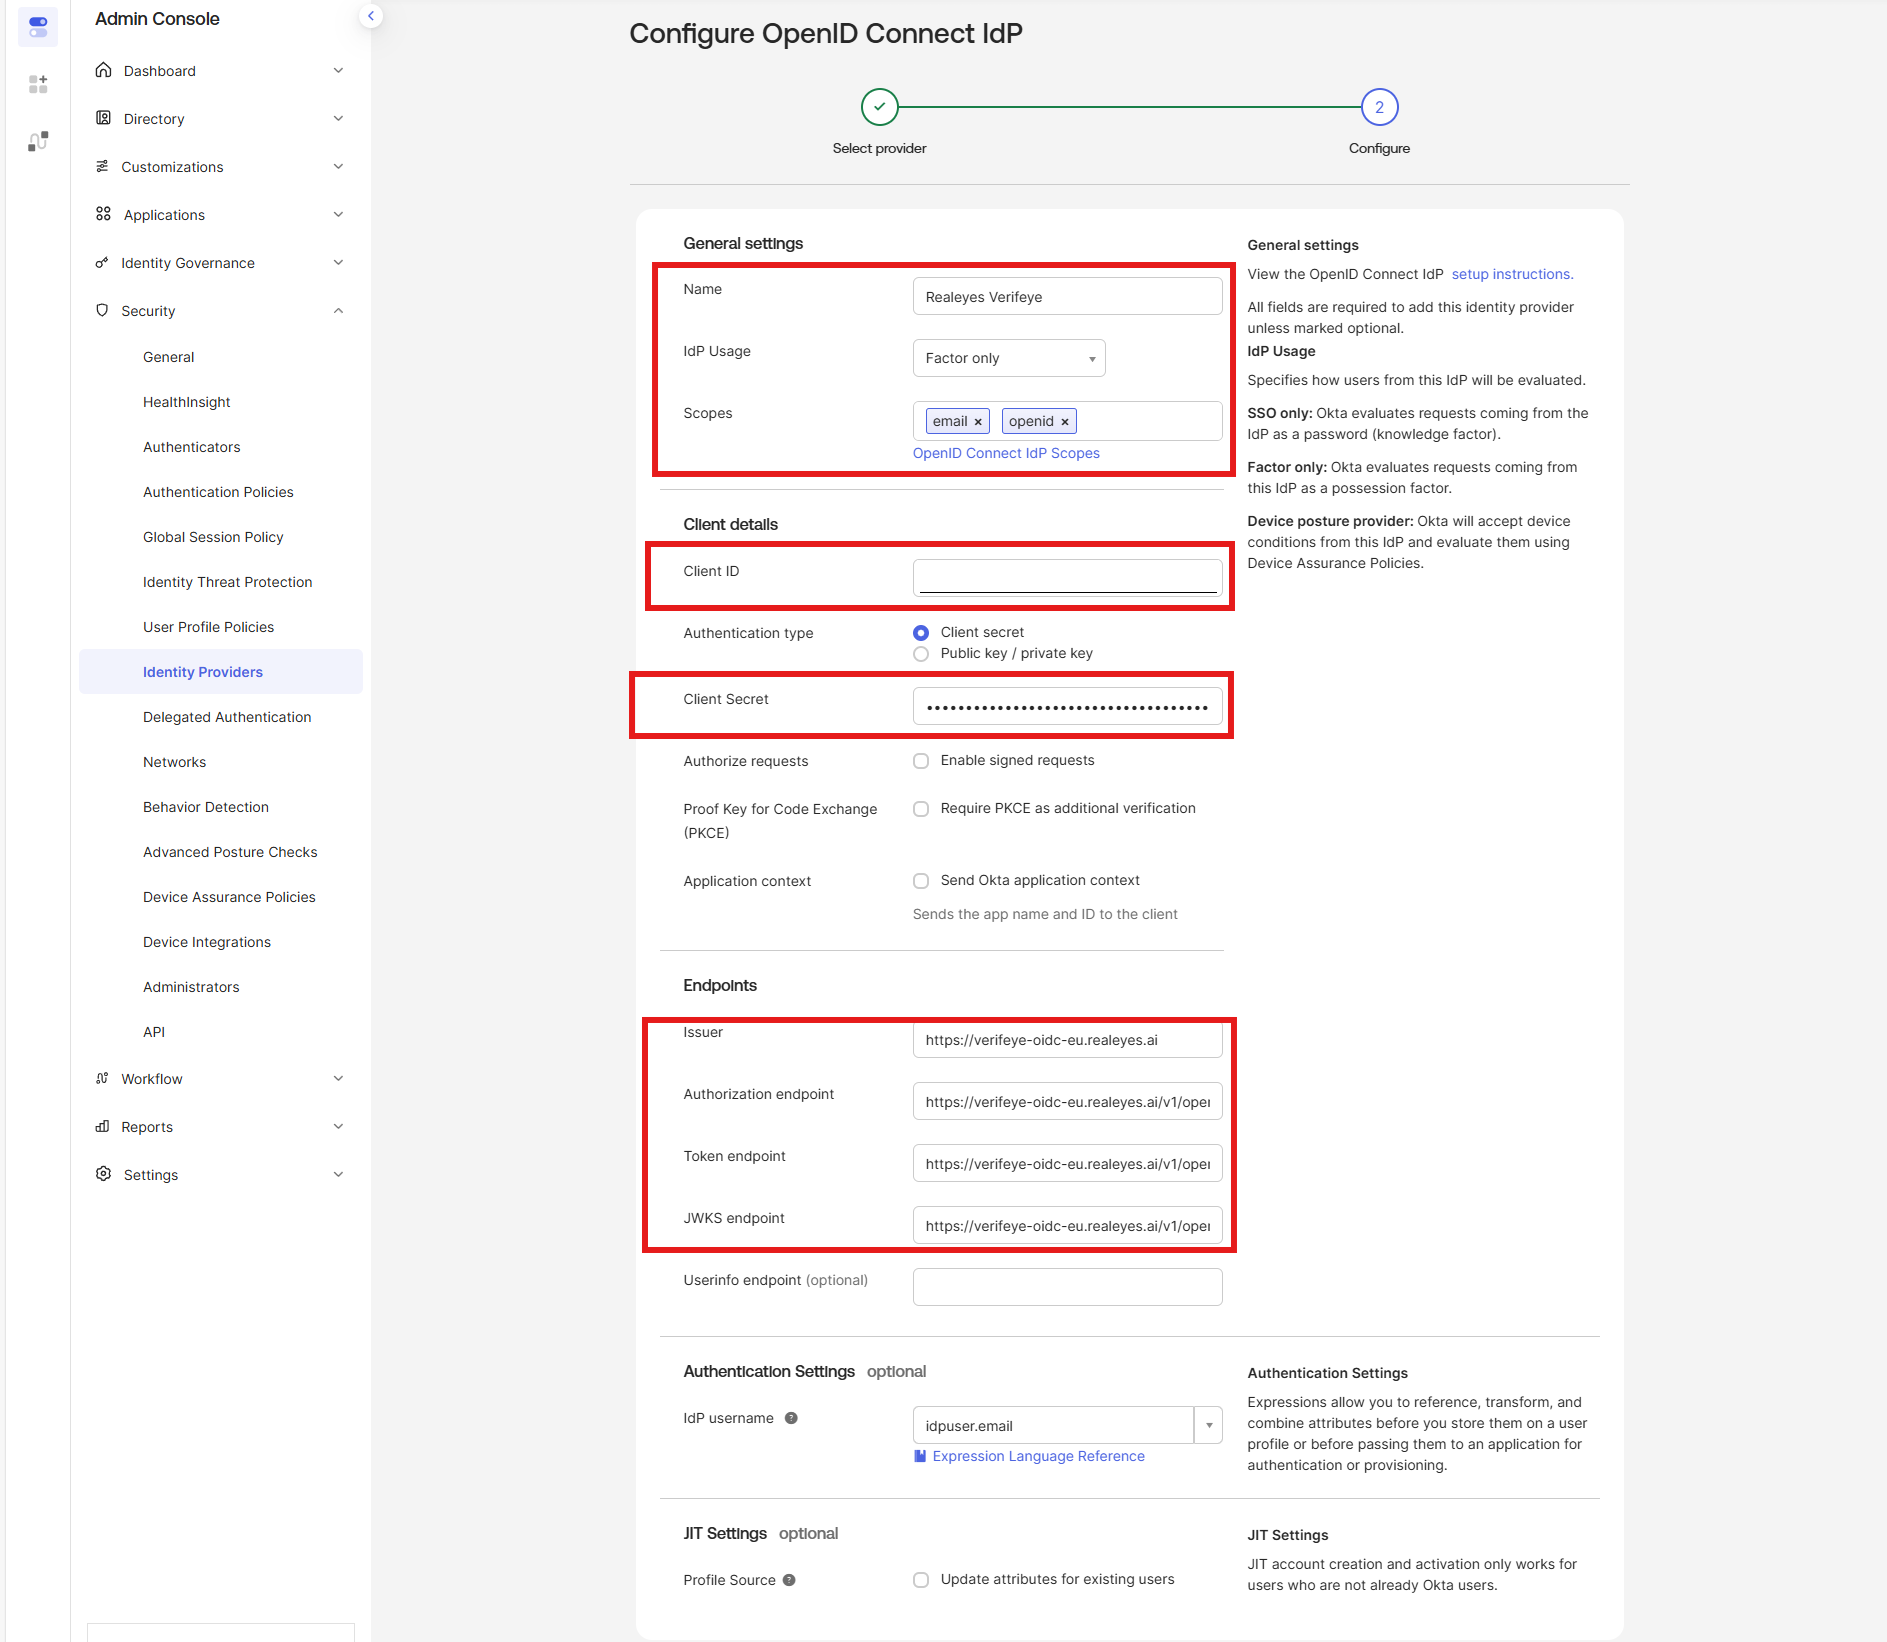
2. Configure Provider Settings
Configure the following basic settings:
3. Configure the Endpoints
Set the OpenID Connect endpoints depending on your VerifEye region, for example for the EU region:
Required Additional Settings
After creating the OIDC provider, you must configure additional authentication settings:
1. Set Up an IdP Authenticator
- Create a new authenticator that uses the VerifEye OIDC provider
2. Create or Update your App sign-on Policies
- Define your rules for when the VerifEye authentication should be triggered in your authentication policies
Additional Resources
For detailed configuration options and advanced settings, refer to the official Okta documentation:
Important
Remember that configuring only the OIDC provider is not sufficient. You must also set up authenticators and authentication policies to ensure proper security and functionality.